
Editorial - December 2007
FPS Creator X10 - it's been on the lips and minds of everyone for such a long time. Now it's here, and living up to the expectations that have preceded it's release. Later in this issue, Lee will give you his report on the last few days of development, the mastering of the final product, and his focus for the near future. The realisation of the potential this brings to the community is what excites me most. Having seen the amount of media, tools and ultimately games that have materialised in the last 2 years, the future looks even more promising. With the advent of the TGC Marketplace, the 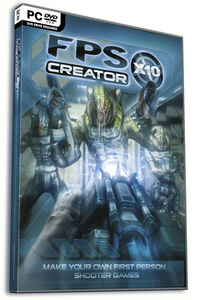 route to potential customers is easier; the new technologies in the product allow for greater scope; and the licensing model outlined by Lee in his article allows anyone to take their product to a commercial level without the concerns of a big investment before sales are realised.
Aside from this major milestone in TGC's history, this month also brings the release of the free version of DarkGDK, in conjunction with Microsoft. Updated plugins add to the potential of the GDK, whilst we have more community releases for FPSC, freeware releases of classic DarkBASIC games, a great tutorial on the use of bitmap fonts and too much more to mention. In fact, there's so much to deliver in terms of brand new information, there is no time to mention Christmas!
So enjoy the last edition of The Game Creators Newsletter for this year, and we look forward to serving and working with the continually expanding community in 2008, may it be a prosperous year for all!
Until next year,

contents
(1) FPSC X10 (2) GDK (3) FPSC News (5) DBPro (6) Tutorial - Bitmap Fonts (7) Lee's Tip of the Month (8) Convention (9) PlayBasic (10) From the Forums (11) Winner (12) Outro
FPS Creator X10 Reporting for Duty

The product is complete. The final build was created on the 14th November 2007, which by the time you read this will have been mastered, packaged in a very cool box and priority shipped to all those who pre-ordered. The second the master was out the door, work began on the four additional languages required to form the EFIGS edition of the product which is where we find ourselves now.
Testing went very well, and the issues we found were few and far between. We have tested on 32-bit and 64-bit versions of Vista, in both administrator and standard user mode. A huge testing farm has checked the software against all known NVIDIA DirectX10 graphics cards. The ATI drivers are getting faster, but are not quite there yet in terms of stability, but we did find that using Catalyst 7.7 is your best bet if you have an ATI card at the moment. We also found that by switching off most of the advanced visual effects some decent frame rates on the lower 8500 and 8600 cards were possible, whilst still retaining full scene bump mapping and bloom (and perhaps a pinch of reflection).
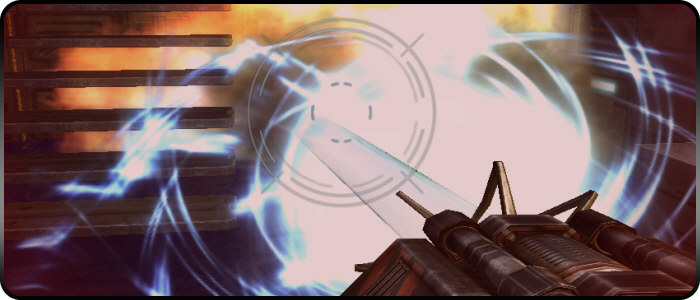
We also went through the process of ensuring we gained the 12+ rating we needed for Europe, which was an interesting challenge. We have had great interest from the educational sector in our original FPSC product, and we wanted to ensure that X10 was ideally suited to this market. To that end we have rigorously obeyed the tenants set out for a 12+ title including the removal of realistic death sequences, red blood splats, nudity and a few other tweaks. To our delight, we gained the 12+ rating we sought which allows us to capture a much larger market and appeal to more users. Don't panic though, if you wanted realistic death sequences and blood, we are releasing a free blood-pack when you buy X10 from us which will activate all the gory fun and bring spectacular ragdoll back under your control.
Translation work is proceeding very well, and it is quite a task. We have a huge built-in manual, lots of videos and a body of artwork that all require localization. The good news is that this is nearly complete, and we look forward to producing versions of X10 for Europe soon.
The final version of X10 will be a uniquely edited US edition that will conform to the ESRB rating system. This will allow us to enter a wider retail market, something the original FPS Creator product could not do. This US edition will be very similar to the other X10 products with perhaps the additional feature of not being able to shoot allies and neutral characters, which is frowned upon for TEEN rated products. Again, this feature will be optional and can be re-activated by installing the free pack from your X10 downloads.
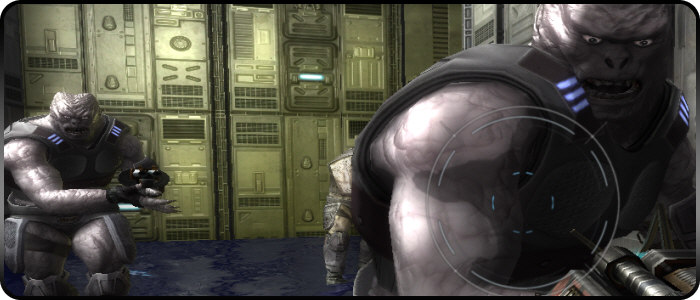
You will also be pleased to hear that we have a growing collection of very cool X10 models in the works too, so there is plenty to look forward to in the world of FPSC X10, including a new type of creature entity for the creation of animals and other strange beasts. We are also interested in hearing from artists who believe they can match or even exceed the graphical quality demonstrated in X10. This product will create a tremendous demand for content, and if you can create cool content, you could find yourself making a lot of money!
Finally, we have some good news regarding the license to sell what you make with X10. We have kept it very simple. You are free to sell your X10 games any way you wish, and keep every penny of the first five thousand dollars. No royalties or complex contracts; just buy X10, make games and sell them. When you earn more than five thousand dollars from your X10 games, you buy our one-off extended license for $999 and then continue to sell your X10 games. This is a one-off license that allows you to sell as many X10 games as you like, forever, without paying us another penny. Our aim has always been the support of indie developers and bedroom programmers, and we are pleased to offer you the chance to create true DirectX 10 games and sell them to a growing Vista marketplace.
A Note of Thanks
A special thanks goes out to everyone from the TGC convention and those on the forum who helped us thrash out the licensing issues for X10, and come up with a solution that works for everyone. Together, we discovered the original license would have thrown up a flood of support requests and a fair amount of confusion. If it was not for your direct and enthusiastic involvement in amending the license, we wouldn't have a winning solution for indie developers right now, and the entire community owes you a great debt of gratitude. My advice to all game authors out there; when you make your first $4000 with X10, you owe these guys a drink!
FPS Creator X10 Gallery
To give you a final taste of the product and it's wealth of features, here are a handful of screenshots highlighting various aspects. Click on an image for a bigger preview.
Auto Update Feature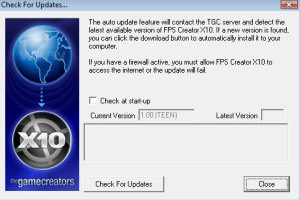 |
Video Tutorials |
French Title Page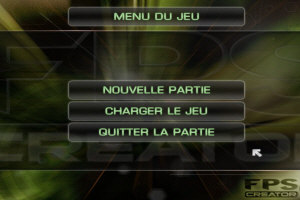 |
Curvy Wall Shader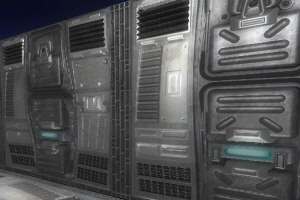 |
Refraction Shader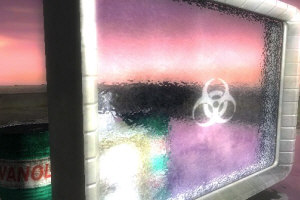 |
Lots of Objects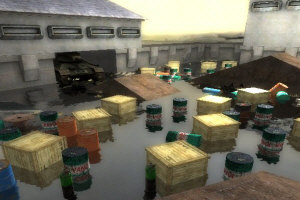 |
Soft Particles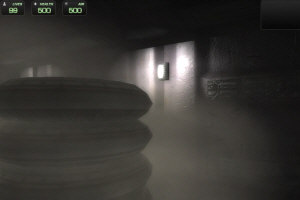 |
GDK moves into a new era, and a new arena

Free Professional Game Development Environment
The Game Creators are pleased to announce that their flagship C++ game development package, Dark GDK is now included free of charge with Microsoft Visual C++ 2008 Express, part of the Microsoft Visual Studio Express range. The latest edition of Microsoft Studio Express was released on November 19th, with DarkGDK included for download on the Studio Express website from day one.
"At the turn of the millennium when we first started selling Dark Basic I made a rough plan of where we would be in the future.", says Rick Vanner, Financial Director. "I had estimated thousands of users making games with our technology. Well until recently we had been successful in this plan but not to the levels I had projected. With the GDK tie-in with Microsoft I feel we have our best chance ever of capturing a much larger audience of game makers. The promotion justifies the many years the whole team have worked on our game making technology and we're very excited to see what happens in the future."
Dark GDK offers you the power of DarkBASIC Professional, with complete integration into Visual C++ 2008 Express's development environment. Harness the power and performance of C++, including full IntelliSense support in Visual C++ 2008 Express. As well as the development kit, you also get:
- Royalty-free license (for personal use)
- Collection of fully animated and professionally produced 3D objects (25+ people and monsters, 20+ vehicles, 10+ weapons, plus much more!)
- Extra game assets (videos, bitmaps and models, 35 MIDI music files, 120+ audio files, 200+ WAV sound effect files, and 4 MP3 game soundtracks)
- Beginner and Advanced tutorials covering, amongst other topics, shaders, game level walkthrough, 3D Object handling, and Dark Invaders, a complete game tutorial.
- and much more!
To get started, you need:
![]() The Microsoft VC++ 2008 Express edition. You can download this from the Microsoft Visual Studio website.
The Microsoft VC++ 2008 Express edition. You can download this from the Microsoft Visual Studio website.
![]() The Game Creators DarkGDK package, also available for download from the Microsoft Visual Studio website.
The Game Creators DarkGDK package, also available for download from the Microsoft Visual Studio website.
![]() The August 2007 DirectX 9.0c SDK, click here to download directly from the Microsoft file servers.
The August 2007 DirectX 9.0c SDK, click here to download directly from the Microsoft file servers.
![]() After downloading, we recommend that you read the installation guide to ensure a smooth transition into your new game programming environment.
After downloading, we recommend that you read the installation guide to ensure a smooth transition into your new game programming environment.
Tutorials
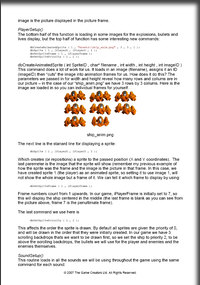 Included in the download, as mentioned earlier, are a comprehensive set of tutorials. So if you haven't programmed in Visual C++ before, these provide the perfect opportunity to get started using first person shooters, puzzle, or real-time strategy games as your motivation to learn.
Dark Invaders is a full game tutorial included for you to learn from, providing the code to speed up the learning curve. At 40 pages in length, it takes you through planning, setting up the game, title screens, game levels, player and enemy control, game completion and finishes with a chapter on how you can enhance the game further.

Enhanced Animations for GDK plus update 1.4
Enhanced Animations has been updated to now work with GDK. Now you can use all of the features that are included in the DarkBasic Professional version of the plugin with Dark GDK. These features include:
Blended Transitions
This feature will allow you to smoothly transition from one animation to another. Your object won't instantly go from walking to running. Instead, it will transition from a walk to a run over a period of time that you set. The animations will be blended together throughout the transition.
Time Based Updates and complete control of Speed
Since the updating of animations is based on the amount of time that has elapsed, the animation will play at the same speed on all computers. The speed settings of animations are all based on how many animation frames will elapse per second. You can even give a negative "frames-per-second" value to the speed settings to play your animation in reverse.
Fast loading Times
Animation files are created by extracting the animation data from your 3D object. You can then save a copy of the models that will use that animation data with all of the model's animation data removed. This can all be done in the media preparation stages of creating your game. Inside your game, you can load the models without any animation data (which will load very fast). Since the animation data files that were extracted from your object can be applied to any similar 3D object, the data only has to be loaded once. This could really reduce the headaches of long loading times for your players!
Key Frame Control
You have complete control over the animation data. You can easily add, modify and delete key frames. You can then save the data to a new animation file. If you desire, you could write your own animation creation program using the commands of this feature.
Limb Hierarchy
Find out information about how your object is structured. You can easily find the parent and children of any limbs in your object.
![]() You can download the demo to see Enhanced Animations in action.
You can download the demo to see Enhanced Animations in action.
![]() You get both the DarkBasic Professional and GDK versions of the addon for one price! Click here for more information.
You get both the DarkBasic Professional and GDK versions of the addon for one price! Click here for more information.
Enhanced Animations has also been updated to version 1.4. This update includes a couple of bug fixes and speed optimizations.
EZrotate for GDK
As reported last month, the update for EZrotate is now available on the site. Current owners of EZrotate Enhanced receive version 4 for DarkBasic Professional and GDK at no additional cost - check your order history for the download.
![]() New users of the plug-in can visit the product page to make their purchase.
New users of the plug-in can visit the product page to make their purchase.
News from the World of FPS Creator

From tools and model packs to classic games, we have a selection of newsworthy items relating to FPSC Creator.

Model Packs 11 to 15 cover a wide range of media, from outdoor buildings and scenery, to sci-fi environments.
 Model Pack 11
- 15 rock formations
- 5 fence sets including 16 variations
- 6 stone wall sets including 23 variations
 Model Pack 12
The sci-fi pack is the ultimate pack to help you make atmospheric looking sci-fi themed scenes. The pack includes tech pieces that you can use as props in your sci-fi coridors, including computer stations, controls panels etc. What's more, we provide you with 5 texture variations so you can alternate the look of your game levels.
-
45 room segments
- 6 character models
- 80 styled entities
 Model Pack 13
The village pack is perfect for all your fantasy based FPS games. It's also a great option if you need rural type European medieval structures for your WW2 games. The pack contains faithful re-creations of buildings from this medieval period, and they will be sure to bring atmosphere to your game level.
- 7 buildings in total
- A farmhouse
- A church
- 5 other buildings ready to complete your village scene
 Model Pack 14
The wild west pack contains 8 buildings to recreate a wild west FPS game. Included are 8 buildings, including a barn, weather vein plus other additional wild west buildings all sourced from authentic buildings from this era.
- 8 buildings in total
- A barn
- Weather vein
- Plus other additional wild west buildings
 Model Pack 15
The ruins pack contains 17 worn and broken down building models. These can be used to recreate a WW2 scene, or additionally any such scene where your game requires a village setting perhaps whereby you want to create a sense of anbandonment. Included in the pack are abbey remains, church remains plus lots of other broken buildings.
The Model Packs are available now, and vary in price. Visit the FPSC site for full details.

This pack includes:-
| Construction Entities:- A Compressor Cement Pipe Drain Pipes Conduits Steel Pipes k-Block Wood stack Plasterboard Plasterboard Stack Chipboard Bag of Sand Bag of Cement Gravel heap Sand Heap Cement Heap Steel Bucket Rusty Bucket Saw Spirit Level Skip Saw Horse Green Bag Shovel Grey Tool Box Red Tool Box Blue Tool Box Red Construction Site Helmet Blue Construction Site Helmet Yellow Construction Site Helmet Furniture Entities:- 1960's Style Round Table Credenza Grey Designer chair Brown Designer Chair Blue Designer Chair Orange Moon Chair Cream Moon Chair Blue Moon Chair Partners Desk Walnut Chest of Drawers Grandfather Clock Wooden Box |
Medical Entities:- |
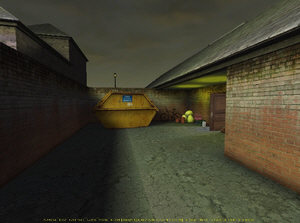
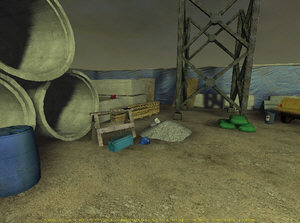
![]() Model Pack 16 is available now (£11.99, $19.99, €16.46) from the FPSC site.
Model Pack 16 is available now (£11.99, $19.99, €16.46) from the FPSC site.

Butter Cutter is a rapid CSG tool. You place a "cutter" shape in the same way as you would place a door or window in the editor. It cuts a section of the wall away underneath it. This means that you can turn any of your existing segments into rubble!There are a selection of different cutters, including ones that leave girders poking out of the damage, segments that are blocked by concrete...even wood barricades over the hole that can be destroyed.
The pack contains 126 new editor items, which breaks down into:
- 23 Regular damage holes.
- 18 Damage holes blocked by wood reinforcements.
- 18 Damage holes blocked by steel girders.
- 21 Damage holes with destroyed metal re-enforcements poking out of the rubble.
- 13 Damage holes, filled with a destructable plasterboard wall.
- 13 Damage holes, filled with a destructable concrete wall.
- 9 Damage holes filled with Destructible wooden re-enforcements.
- 6 Different destructible pillars with 4 different internal structures inside.
- 1 Completely destroyable segment wall.
![]() Butter Cutter is available from the Peanutbutterfingers website
Butter Cutter is available from the Peanutbutterfingers website

With the release of FPS Creator X10 comes the realisation that there has been two years of game creation by the lively community of the original product. Ex-tempora, by Mike Duke was one of the first commercial releases to come to our attention, released in March 2006. The game was developed in version 1.0 of FPSC, with no additional packs or add-ons.
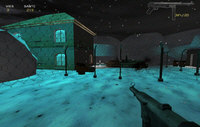 Comparing it to the latest games we have seen and highlighted in recent newsletters would be like comparing any other commercial title from a few years ago to one now. But the one thing that has stood the test of time is the gameplay OPERATION EX-TEMPORA showed just how complex a game can be devised, with thirteen principal objectives, split in 26 playable missions, over 46 maps. It revolves around a complete story and full historical background. Taking an alternative outcome to the Second World War, the storyline covers a futuristic world in which you must locate the Time Machine, followed by a historical WWII environemnt in which you must endeavour to change the course of history.
The full game is available as freeware, and has been previously distributed in French game magazines, even making the front cover.
On the Web...
Downloads:
http://files.filefront.com/Ex+Tempora+++Chap+1+13exe/;5948855;/fileinfo.html![]()
http://funnyshoot.free.fr/ex-tempora/Ex-Tempora_-_Chap.1-13.exe.
Web site :
![]() http://operation.ex.tempora.site.voila.fr/index.html
http://operation.ex.tempora.site.voila.fr/index.html
DarkBASIC Professional Round-up
Box2D Physics for DarkBASIC Professional
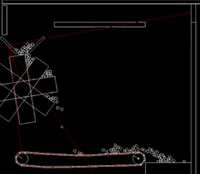 Box2D is a FREE 2d physics plugin for use with DBP, written in C++. The actual physics engine is an open source provision, written by Erin Catto in C++. The Box2D plugin wraps all of the commands in the engine to make it easy to create a fully functional 2D environment in as few commands as possible. Both the physics plugin and the physics engine are still in active development, and many more features can be expected in future releases, such as continuous collision detection, particles, ropes, ray-casts and much more. The current release is v1.4.1 and already contains most of the commands you will need to get started.
![]() The Box2D plugin can be downloaded here. You'll need to put the dll file in your compiler/plugins-user folder.
The Box2D plugin can be downloaded here. You'll need to put the dll file in your compiler/plugins-user folder.
![]() Visit the main forum thread to join the discussion, and check for new updates to the plugin.
Visit the main forum thread to join the discussion, and check for new updates to the plugin.
![]() There is also a YouTube video of the machines demo in action, which is definitely worth watching to see how flexible the physics implementation can be.
There is also a YouTube video of the machines demo in action, which is definitely worth watching to see how flexible the physics implementation can be.
Game Music

Daz Dicks has released his latest collection of tracks designed specifically for games. It's the Action Pack, and contains 8 Action themed musical loops in mp3 format to use royalty free in your commercial or non-commercial projects.
![]() There is a sample available for download here, and you can purchase the pack by clicking on the Action Pack link directly from Daz Dicks' website.
There is a sample available for download here, and you can purchase the pack by clicking on the Action Pack link directly from Daz Dicks' website.
Star Wraith and Rift Space now free
Starwraith 3D Games has just released it's hit titles Starwraith IV and Riftspace for the public in honour of the release of Arvoch Conflict and Evochron Renegades, their latest titles. These games were developed in DarkBASIC, and became very popular due to the professional presentation and depth of gameplay.
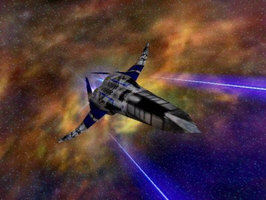 Starwraith IV: Reviction is an arcade military space sim with a story explained in cutscenes and mission descriptions, fantastic graphics and multiplayer modes ranging from Dogfight to Capture the Sphere. You play as the pilot of a small squadron, which you lead with field commands such as Attack, Scatter, Defend and Form. Mission objectives range from retrieving escape pods to carrier assault missions. A random mission generator guarantees lots of diversity and changing gameplay for space enthusiasts.
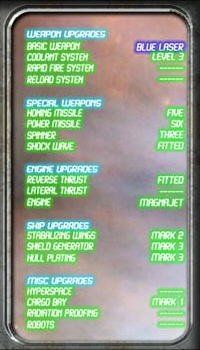
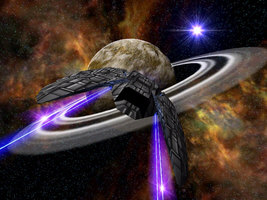 Riftspace is a freeform mercenary space sim in which the player chases the mysterious Vonari Artefact, claiming to hold the secret of a planet that will give shelter to a dying race. The player is free to become a trader, pilot or mercenary as he/she wishes. It features an extensive ship upgrade system amongst a comprehensive set of features.
If you like Starwraith IV, you might also want to check out the sequel and far more advanced military space sim Arvoch Conflict. If you enjoy playing Riftspace, even more choices, options and a seamless universe including planet descends can be found in Evochron Renegades.
![]() Both free titles can be downloaded at www.starwraith.com.
Both free titles can be downloaded at www.starwraith.com.
Tutorial - The Art of Bitmap Fonts

by Craig Chipperfield
Bitmap fonts; what are they and what can you do with them? Well, before we look at bitmap fonts it is important to look at ‘normal', or True-Type fonts.
DarkBASIC Professional has a number of text commands which can be found in the help file under the section ... wait for it ... Text Commands. Using these commands we can load in any font that is in the windows/fonts directory and set its point size, set it to bold, underline or italic and we can change its colour. Other than that, there is little else we can do to change the appearance of the fonts. If we want to make fonts like in the title of this tutorial, that look like they are made of metal, fire and neon lights, or indeed any appearance other than plain, single coloured text then we need to use bitmap fonts.
So, what are Bitmap fonts? A bitmap font is a collection of images that represent text characters, and because they are images they can be made to look as graphically pretty as we like. The advantage of using them is, of course, the ‘prettiness'. The disadvantage is that they are a little trickier to set up and use but don't worry, this tutorial (and the accompanying code) will make things much easier for you.
![]() Before we can start with the code, the first thing we need are some bitmap fonts. There were three packs of fonts given away in previous editions of the newsletter and I have made a new pack specifically to tie in with this tutorial. All four packs of bitmap fonts can be downloaded by clicking here.
Before we can start with the code, the first thing we need are some bitmap fonts. There were three packs of fonts given away in previous editions of the newsletter and I have made a new pack specifically to tie in with this tutorial. All four packs of bitmap fonts can be downloaded by clicking here.
There are two ways we could display bitmap fonts.
- Using Sprites
- Using Textured 3D plains
This tutorial will deal with the first method but it is easy to take the code and change it if you would rather have 3D plains.
Now that we have got our bitmap fonts and we have established that we are going to display them using sprites there are four steps to getting them on screen. So, you see, it is a little more complicated than a simple TEXT or PRINT command to use true-type fonts but I think you will agree; the end results are worth it.
 Anyway, those four steps:
- 1) Load the font file into DBP
- 2) Cut the fonts into single character images
- 3) Trim the wasted space to the left and right of each character.
- 4) Get them on screen
Depending on which bitmap fonts you are using, it is not always necessary to go through step 3. Many bitmap font files have each character the same width but I think that it looks ugly to have a ‘W' the same width as an ‘I', which is why all my fonts use the trimming method.
If you don't want to know the technical details of how the bitmap fonts are loaded and displayed but instead you just want to get them into your project and working, then skip ahead to the end of this tutorial where I will tell you the basics of how to use them.
You still here? In that case, you obviously want to know how this all works. So, let's look at those four steps in a little more detail.
Step 1: Loading the font file.
The font file is a simple image file. So, to load it, all we have to do is use the LOAD IMAGE command.
Step 2: Cutting up the fonts into single images.
The best method of doing this is to use memblocks so that we can retain any transparency in the image. Firstly transfer the font image into a memblock, then copy an area of the memblock into a second one and make an image of that. Repeat those steps until all the characters have been made.
You can see how this is done if you download the code but don't worry if you don't understand memblocks. At the end of this tutorial I will provide very simple steps to get bitmap fonts into your projects without having to understand any of it ... brilliant!
Step 3: Trimming the wasted space from each side of the characters.
Again we will use memblocks for this and look at each character in turn. We can look at each column of pixels from the left side and if there are no non-transparent pixels, we can safely say that we have found our first bit of wasted space. We continue with that until we do hit a non-transparent pixel and then repeat from the right. Instead of actually trimming the image file down, we simply store a variable to represent the left edge of the character and another variable for the width of the character. We can use these values later in the display code to correctly position each character.
In the code provided; steps 1-3 are all carried out with a single command:
fontStyle = LoadBMfont( filename )
fontStyle is a variable used to represent each style of bitmap font. Using a method like that means that we can load in as many bitmap fonts as we like and easily display the one we want simply by referring to it by name.
Step 4: Displaying the fonts.
To display the fonts, we need to find the next available sprite number, create a sprite for each character, store the sprite number for the first character and store the length of the string. This is all taken care of in the provided function and is best explained by reading the code.
How to use the supplied functions
(This is the bit to jump to if you have just skipped the techno waffle)
 InitialiseBMfonts()
You will need to call this at the start of your project but after any display setting commands. It sets up variables and arrays ready for use in the other Bitmap font functions.
fontStyle = LoadBMfont( filename )
This function loads a Bitmap font, cuts the individual images and trims the waste space from the edges.
fontStyle is a variable that you can use to reference a Bitmap style, which is very helpful if you load in more than one Bitmap font.
stringID = DrawBMfont( X, Y, string, fontStyle, Kern )
Used to display the Bitmap font on screen.
stringID is a reference to the Bitmap string. You can use this reference to show, hide etc. the entire string in one go without having to reference each sprite image individually.
X & Y are the screen co-ordinates of the top left of the string.
String is the string to display on screen.
fontStyle is the reference to the previously loaded Bitmap font.
Kern establishes how much space to leave between each character.
hideBMfont( BMstring )
showBMfont( BMstring )
scaleBMfont( BMstring, scale )
sizeBMfont( BMstring, sizeX, sizeY )
The above functions will use the associated sprite commands on all of your bitmap string simultaneously.
positionBMfont( BMstring, X, Y )
This will position a previously created bitmap string at the X and Y screen co-ordinates specified.
alterBMFont(BMstring, X, Y, S as string, fontStyle, Kern )
This function will change any or all aspects of your bitmap font string.
BMstring is the ID of a previously created bitmap string.
X is the screen X co-ordinate to display the string.
Y is the screen Y co-ordinate to display the string.
S is the string to display. It doesn't have to be the same as it was, you can use this function to change the contents. Ideal if you bitmap string is constantly changing (like an ingame score for example).
fontStyle As in the DrawBMfont function this variable is the style of Bitmap font to use and MUST already be loaded. It doesn't have to be the same as it was though and you can use this function to change the style of font used.
Kern Again, Kern is used to establish the x distance between each character. This function can be used to alter it.
![]() The download contains all the code you need to get Bitmap fonts up and running and also a single Bitmap font file to get you started. If you want more fonts, here is that link again: Download Bitmap Fonts
The download contains all the code you need to get Bitmap fonts up and running and also a single Bitmap font file to get you started. If you want more fonts, here is that link again: Download Bitmap Fonts
![]() The tutorial code and bitmap fonts are also available here
The tutorial code and bitmap fonts are also available here
Lee's Tip of the Month - New Money For Old Rope
For the last few weeks I have been enjoying the buzz you only get from finishing a product and seeing it out the door. This is what we call a master version and it's nice to see the back of them sometimes. You may have enjoyed this feeling yourself, especially the bit about seeing the back of them, but is there something more you can do in additional to releasing patches?
Once upon a time, the production of a demo version would be my next port of call, along with an almost immediate feature upgrade to the product and a few tweak patches. This time I have decided to postpone my usual process, and translate the product into four more languages, all at the same time. I have also decided to get all five languages certified for a Windows Vista Logo. Finally, I have also decided to get them rated for worldwide distribution, an important step when selling into retail. The resources required to achieve the above - as you can imagine - are quite substantial!
So why am I delaying the demo and instead messing about with a finished product? There are many little reasons but they all add up to the goal of increasing software sales. A single piece of software will sell sufficiently, but software available in five languages can be sold to more people. Having a translated version allows you to approach more publishers, and negotiate a better royalty rate. Having an EFIGS version (English, French, Italian, German, Spanish) allows you to offer a product into places a single language version cannot go such as OEM (Original Equipment Manufacturer). Also, having paid for the translations yourself, you own all the IP (Intellectual Property) which comes in very handy when you are negotiating a deal for your software product.
Let us be clear on the next point. Getting your software certified for Windows XP or Vista is not easy or cheap, nor is it quick and painless. To take what you have and make it compliant, your software has to pass over thirty in-depth tests which demonstrate how well behaved your code is. If it is misbehaving you have to change your software, which can be something as simple as adding a few lines to a manifest or as horrible as replacing your entire installer! You then have to pay over a thousand dollars to have it tested. That is the bad news. The good news is that should your software pass the test, you are immediately admitted into the warm embrace of the Microsoft Marketplace Shop, from which those precious additional sales will flow.
Finally, by rating your software through ESRB, PEGI and USK (US and European rating boards), you instantly get a badge which allows you to sell direct to retail and distributors. Without these, you will find it hard to get packaged product out to your customers. Retail is still the major source of income for developers, and still represents 70% of all games industry revenue!
So in a nutshell, that is why I am doing an octopus number on the master version, to open up multiple sales channels, any one of which could prove to be the crucial revenue stream for the product and make the months and years of development worthwhile.
If your software is a utility, you have even more options available to you including the sale of additional 'major' updates, subscription models for continued maintenance, technical assistance fees on a cost-per-hour basis and a myriad of revenues from licensing your software to resellers. If your software is a technology, you can throw in the source code for a premium too!
There are so many spin-offs to a single software product, your head will quite literally spin from the opportunities they will present you. If your passion is creating software for fun, sorry for rambling on about money for so long. If your passion is creating software, then selling it, re-read the above for some insights into how the established developers might do it.
'07 - The Official Game Creators Convention
You can now view two videos from The Game Creators Convention. Unfortunately the sound reproduction hasn't been great, but you will still be able to enjoy the presentations given by Rick Vanner and Lee Bamber. Due to the size of the files, it is recommended that you copy and paste the URL into Windows Media Player, to ensure it streams to your computer. Right-click the video picture and Copy Shortcut. In Media Player, press [CTRL]+[U] to paste the URL.
 Rick focused on the company, it's history, where it is now and what the future holds. You will get an insight into the development of the company brand and portfolio of products, and also hear how the community can get involved.
 Lee presented FPSC X10 to the delegates. As well as a first-time viewing for many, the technicalities and features were also revealed. The video trailer of FPSC X10 seen within this presentation can also be viewed directly on the FPS Creator X10 website.
PlayBasic News
by Kevin Picone
PlayBasic V1.71 Promo Movie
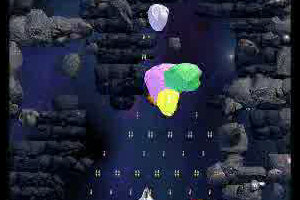 A few months back I had the idea of putting together a slide show of PB games/demos pictures and cutting them into a movie. It was not possible to capture running video in PB V1.63 and below. While the demo editions and PlayBasic home page have a cluster of game demos available, we have relied upon users taking the initiative to shift through the material to find something that tickles their fancy. The site is the main focus for these videos, as many of the more visually appealing demos have to be left out of the demo package due to space constraints. Thus, the demo is often unable to effectively raise awareness of the border possibilities of PB, like even the most simple of movies could.
So over the past few days, I've been capturing a cross section of old and new demo and game examples (running in PlayBasic V1.71) and cutting them into a movie. All in all, there's around 16 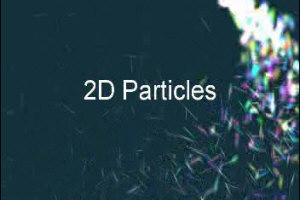 clips. They're not all V1.71 level demos, in fact only about a half of them are. In particular the games - with the exception of one - are all PB V1.62 level programs simply running in PB1.71.
There is also a new demonstration of the perspective platformer. The newest effect is the last part, which is a thrown together space city sitting on a height map. While it's certainly not as pretty as it could be (since it's all generated in code), it shows that even though PB is 2D/3D language you can happily throw a few thousand 3D objects into a scene and the world won't end.
Here's a low quality edition of the movie to download (12 Megabytes):
![]() http://www.underwaredesign.com/files/demos/PlayBasicV171PromoLQ.zip
http://www.underwaredesign.com/files/demos/PlayBasicV171PromoLQ.zip
Where's New PB1.7x Demo?
There have been a few emails regarding the whereabouts of the PlayBasic 1.71 demo. The answer is simple; there's isn't one as yet. That's not to say there won't be one, of course there will be! However, we really can't build a demo until the retail edition has matured. Then we need to update documents, example pack and make the necessary IDE revisions. So it's not just a matter of slapping it up on the server.
The 1.7x (revision) level demo release is difficult to estimate; it could be anywhere from a month to 6 months. It just depends on how long it takes to get from this point to near completed state (as per the design document). But given the work load ahead it's likely to be two or three months away.
Until next time, Over & Out
From the Forums
New boards and new tools feature this month on the forums.
OO Coding with DarkGDK
With the uptake in users of the new, free version of DarkGDK for Micrososft Visual C++ 2008 Express, discussions have started on how you might implement game code with the object oriented style of coding. Join in the discussions in this thread.
Integrated Image Magick
Image Magick is a great API for manipulating and generating images. Improve the scaling, formatting and enhancing abilities in your DB Pro application with this new plugin by Jinzai, made at the request of forum members - myself included.
.
New Poster Feature
FPSC X10 is all about customisation. To that end, there is a new feature that allows you to grab images and plaster them anywhere you see fit in your game levels. Take a look at this thread to see how it's done.
X10 Landscapes
Even before FPSC X10 was out of the door, our beta testers were finding new ways to use the product, and push it in new directions. Here are some fantastic landscapes to peruse, embedded in an FPSC X10 creation.
.
This month's Winner
Each month we pluck one lucky subscriber from the newsletter mailing list and award them a free copy of DarkBASIC Professional. The email address of this month's winner is: te???oft@se??am.cz If this is you then send us an email to claim your prize.
Outro
Share your news with over 14,000 active games developers!
If you have something you'd like featured in a future issue then please get in touch and include as much information as possible (including where applicable: screen shots, URLs and zip files).
Issue 59 deadline - December 27th.


